
CEILING FAN AND LIGHT FIXTURE ACCESSORIES
www.westinghouselighting.com218
Step 1
Easy installation from
below ceiling through any 4"
diameter hole.
Step 2
Rotate bar until teeth are fully
embedded into joist.
Step 3
Attach electrical box and install
fan or lighting fixture per
manufacturer’s instructions.
01400
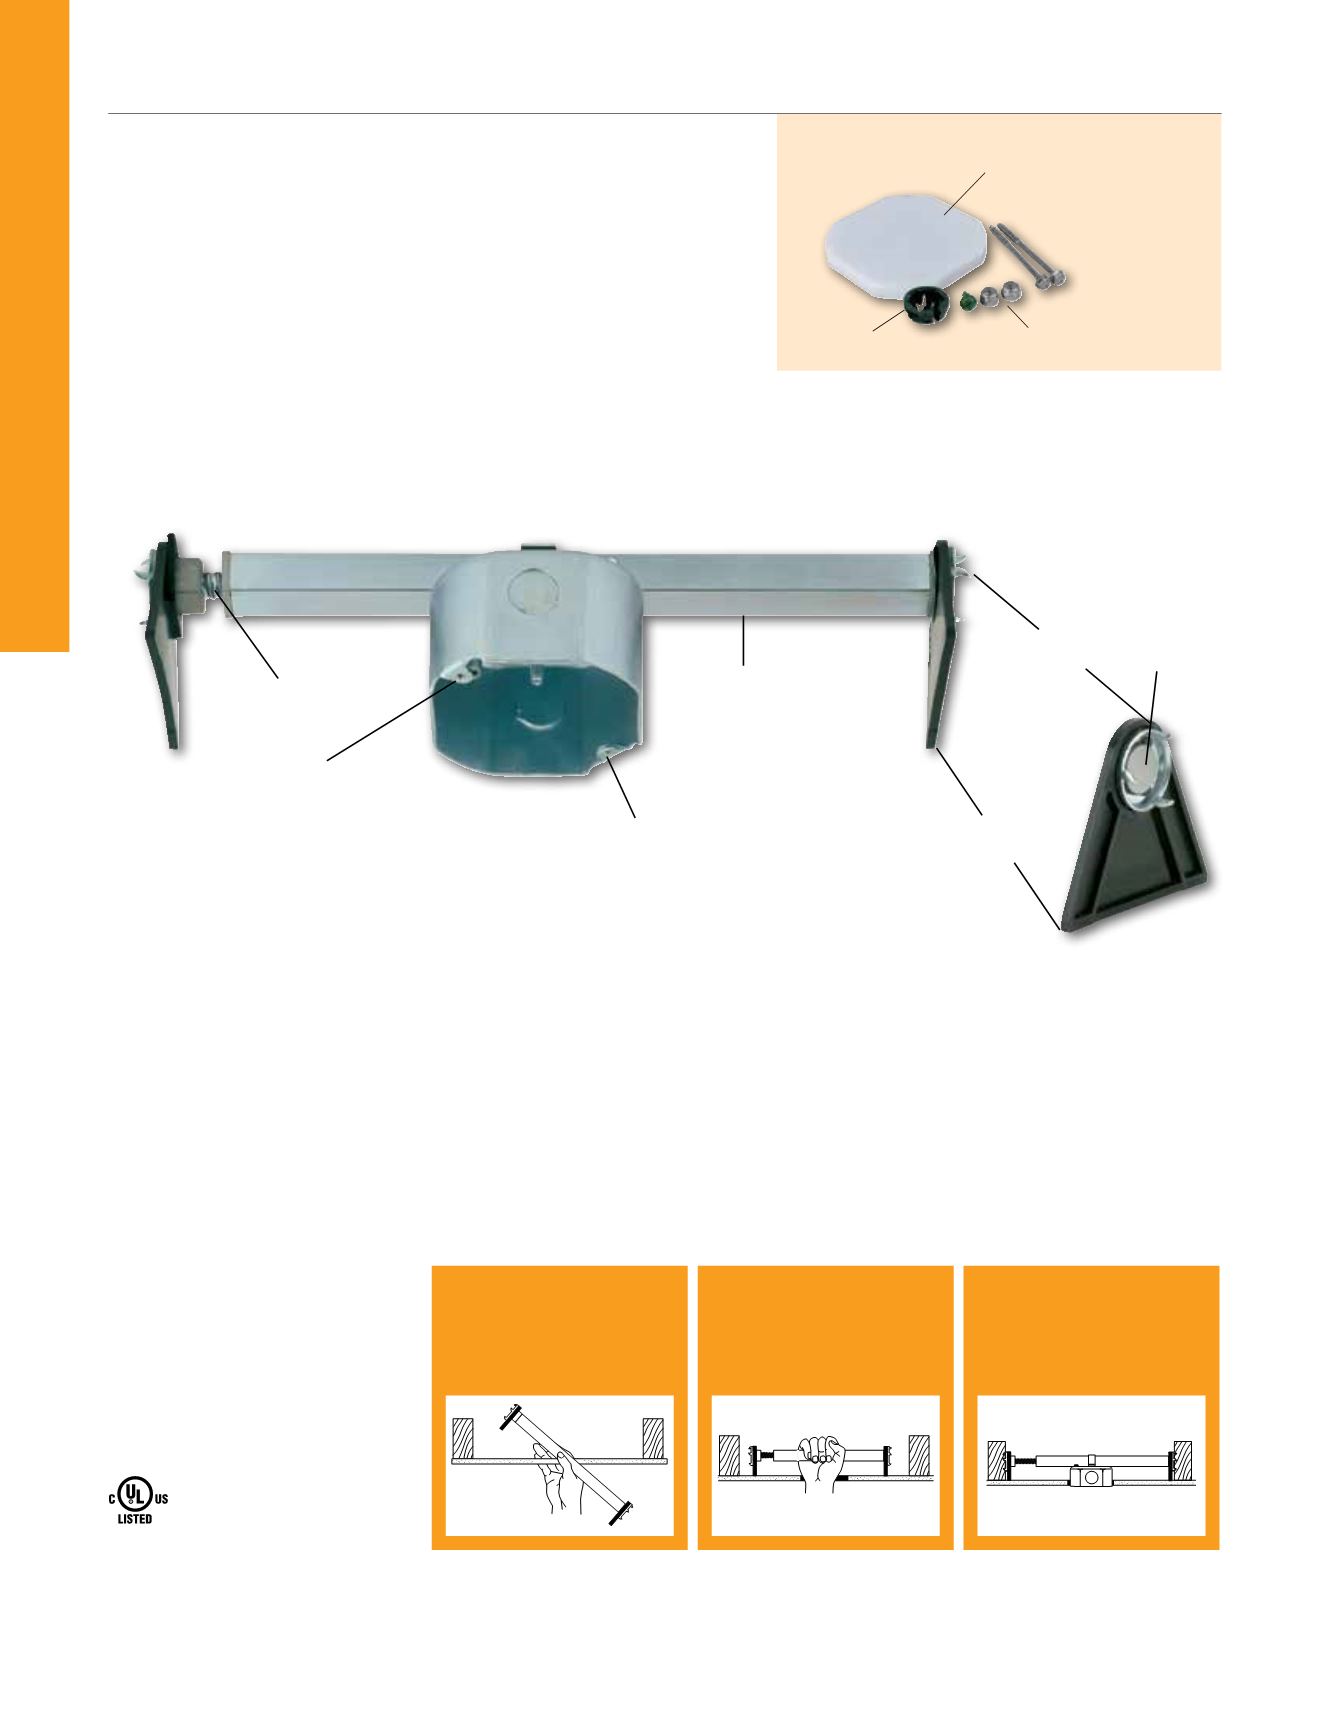
Saf-T-Brace®
Box Depth 2
1/8
"
Heavy Duty, 21.5 Cubic Inch Dual Mount* Electrical Box
6 Knockouts for Conduit or Romex
Individually Packaged, 12 Per Cut Case
Strong Grip
Includes Larger Box for
Increased Wire Capacity
Threaded multiple lead
installs fast
8-32 threads for cover plates
and lightweight lighting fixtures
10-24 threads for ceiling
fans and lighting fixtures
Square tube
for easy turning
Teeth twist and lock
into joist
85E6
Saf-T-Cap® to protect bolts
and wires during painting
and sheetrock installation
Includes Mounting Hardware & Instructions
Mounting hardware
Romex connector
IDEAL FOR RETROFIT APPLICATION
NO ATTIC ACCESS REQUIRED
• Fits 16" to 24" ceiling joists.
• Provides fast fingertip expansion
and positive attachment to joists.
• Fits all ceiling fans.
• Position box anywhere along the brace.
• Features convenient magnet that holds box to brace
during installation.
• For fixture support of 150 lbs. or less on 16" centers.
• For fixture support of 50 lbs. or less on 24" centers.
• Acceptable for fan support of 70 lbs. or less.
Meets or Exceeds UL Standards Regarding Exposed Threads Within Box. Meets or Exceeds NEC
®
Safety Codes.
*Dual Mount = Box is threaded for 8-32 (ideal for box covers and light weight fixtures) and 10-24 screws (ideal for heavier fixtures and fans).
Saf-T-Brace®


